
|
Back to Help Library
Drawing project boundaries31/3/2023 Drawing/Editing project boundaries from a manually created project To draw or edit/delete a project boundary, you need to edit the project. Click on the edit icon on the project summary page (or the stage page if you're editing a stage boundary). If you don't need to edit the project summary, click 'next'. This will take you to the project boundary page. If you're editing a stage boundary, you will be taken immediately to the boundary editing page. 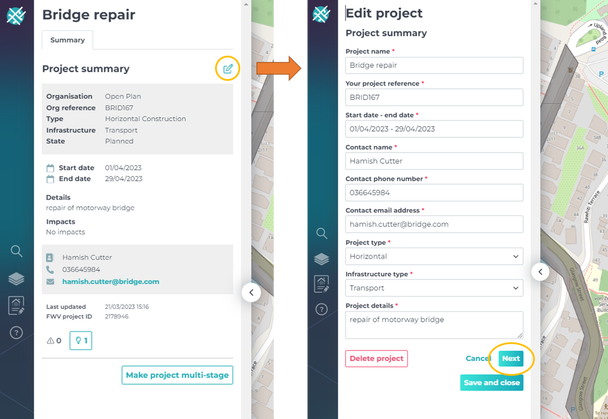 If you need to add an additional shape, click the 'draw polygon' button. If you need to edit or delete, click the corresponding buttons as labelled below. 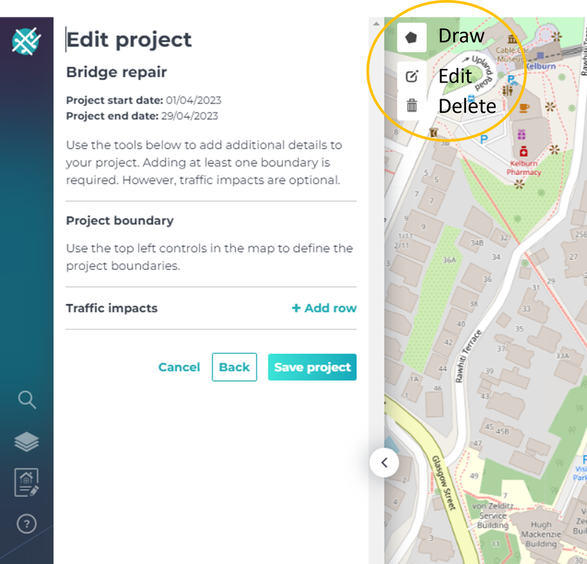 Drawing a project boundary Click the drawing icon. Click on the map where you want to start drawing your project. Using your mouse, click each point along the road/shape you want to draw. To finish drawing, double click, or click 'finish' in the drawing menu box.  Editing a project boundary To edit an existing boundary, click on the edit tool. This will create anchor points (white squares) around each shape that you can edit. Click on an anchor point to move it. Dragging the anchor points will sometimes create additional anchor points either side of the initial anchor point you moved, allowing you to create a more precise shape. Click save in the drawing menu bar to commit the change. Click 'save project' to save all of your changes. 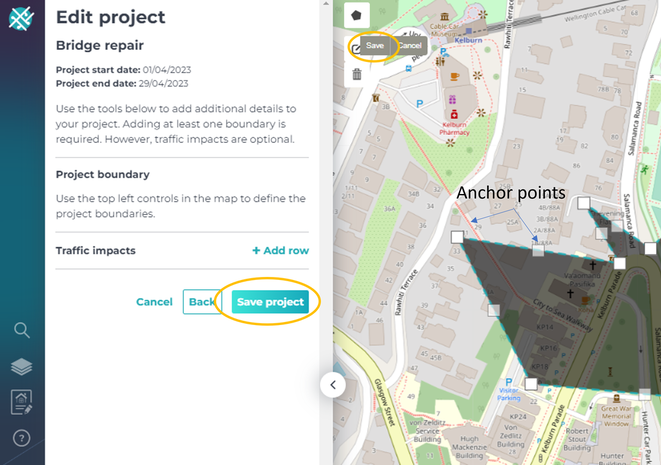 Deleting a project boundary Please note all projects and stages need at least one boundary. If you need to delete a project boundary, click on the trash can in the drawing tool. Then click on the shape you want to delete. This will make the shape disappear. If there are many shapes to delete, you can select 'clear all' from the drawing tools menu. To commit the change, click 'save' in the drawing tool menu. Click 'save project' to save all of your changes. 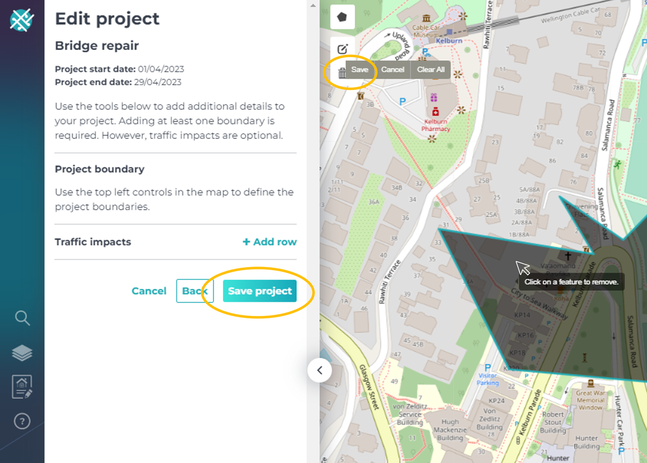 Drawing/editing boundaries from a automated project upload supplied with no shapefile Organisations can supply us with projects that don't have a shape file, and the organisation can then draw the shape on the map within the Forward Works Viewer. For example, if you supply us with an excel spreadsheet of your projects, we can upload this sheet, and you can find your project in the FWV and draw it on the map to get the clash and opportunities. Once your data has been uploaded, find your projects in My Organisation's Projects and select the Filter: 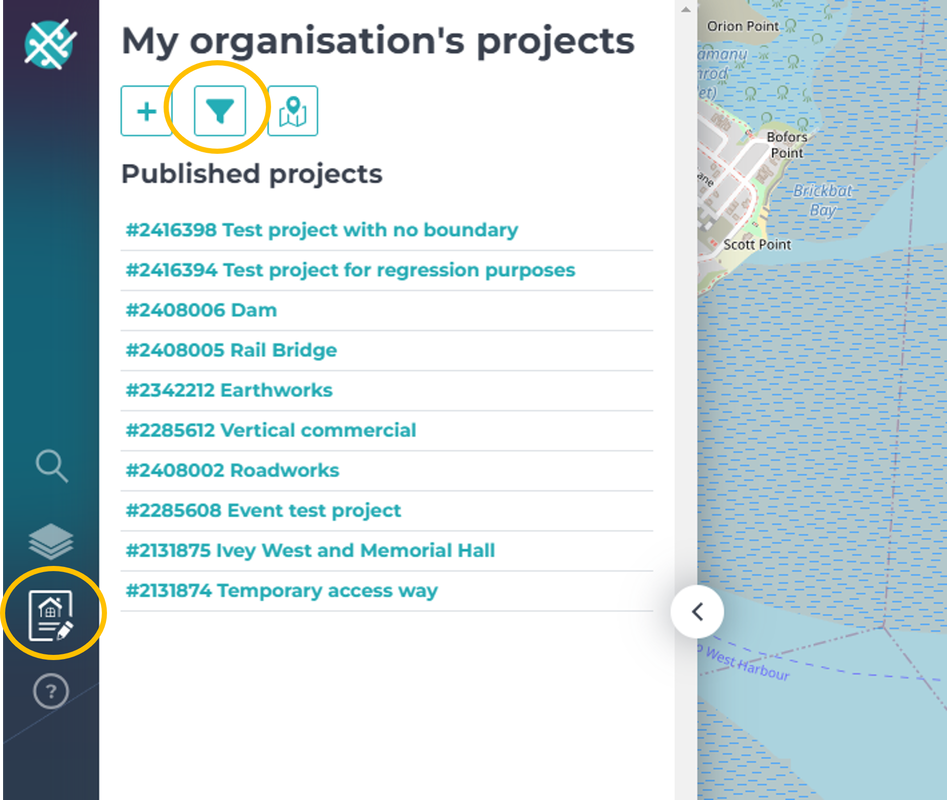 Select 'Projects with No Boundary', apply the filter and this will bring up a list of all projects for your organisation which do not have a boundary supplied.  Click on the project to bring up the project summary page, then select the 'edit' button. TOP TIP - it's helpful to use the Location search in the top right of the map to navigate to where you want to draw your project, before you hit the edit button. 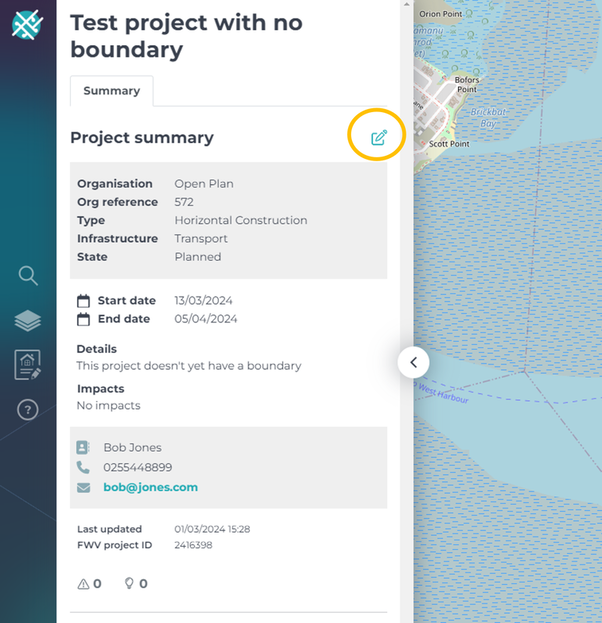 Use the drawing tools to create a project boundary - select the top polygon tool to begin drawing. 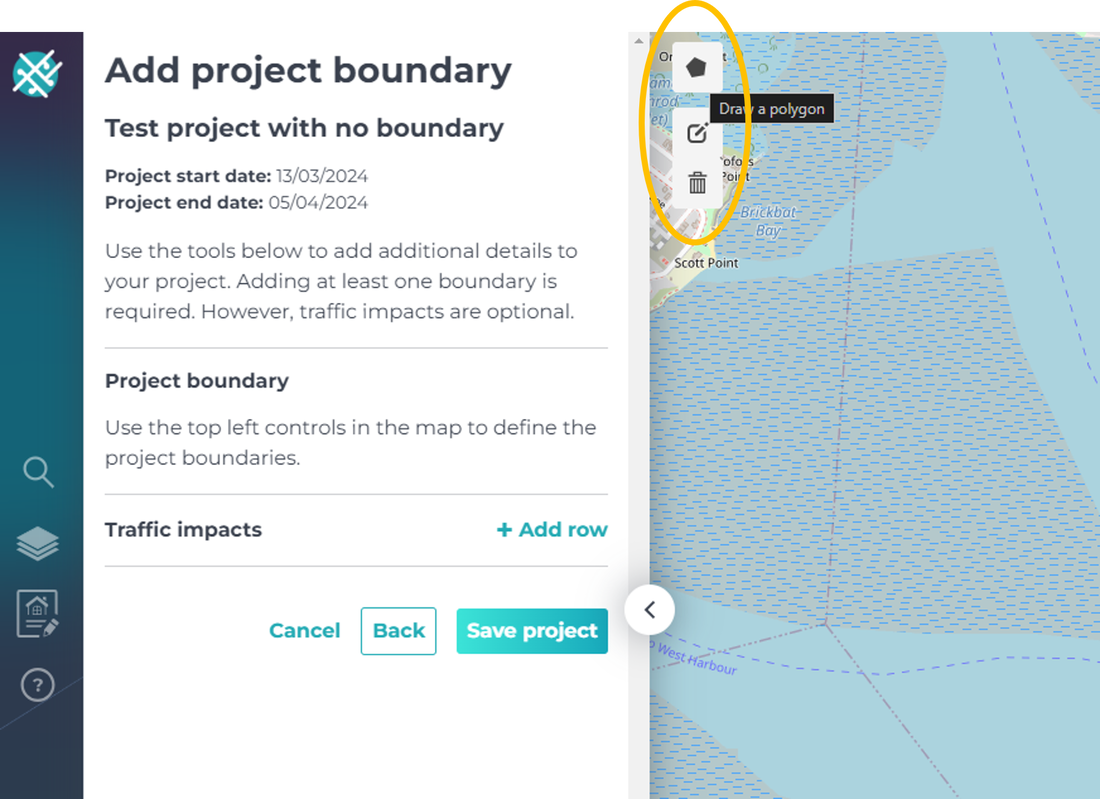 Click on the map to draw a polygon point, and each map click creates another point. These points can be dragged around the map to create intricate shapes. To close the shape, double click on a point, or click 'finish'. 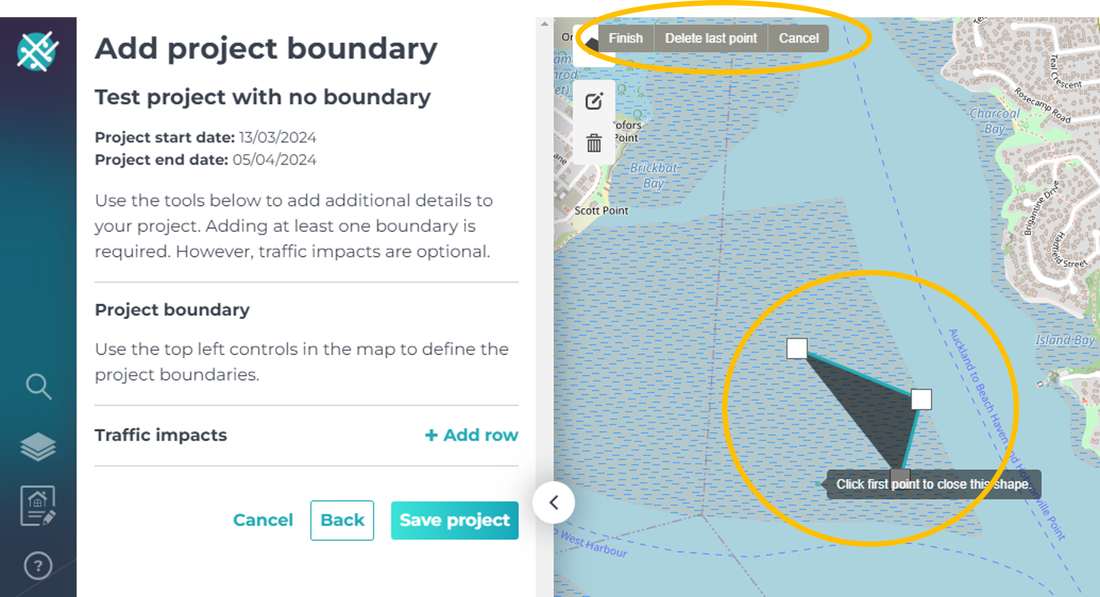 Click 'save project'. Your project shape will appear on the map, and will now generate clashes and opportunities.
Comments are closed.
|

|
E: [email protected] A: SaltWorks, 4 Ash Street, Christchurch P: 0210 493 219
|
© COPYRIGHT 2021. ALL RIGHTS RESERVED.
|
|
|

|
|

|

|